Skull figure assembly tutorial
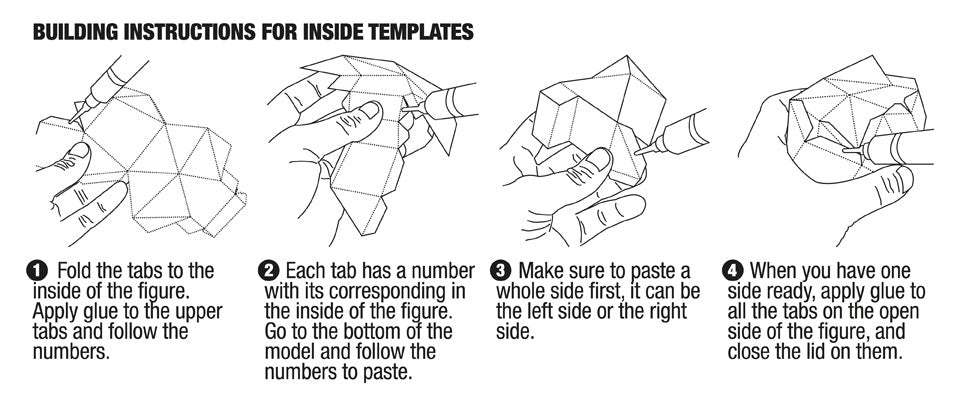
Assembly tutorial for the I Need your Skull figure from Proyecto Ensamble. In the following image you will find a tutorial diagram on how to assemble the Project Ensamble skulls.
For this task you will need glue and some time, each template comes pre-folded and comes with guide numbers for gluing. Very young children will need help.
- First of all you must fold the tabs towards the back or inside of the figure. Apply glue to the top tabs and follow the order of the numbers to glue them.
- Each tab has a number that corresponds to a number located on the back of the template. Find the tabs on the bottom section of the model, follow the order of the numbers to glue and stick.
- Make sure you glue one full side first, it can be the left side or the right side.
- When you have one side ready, apply glue to all the tabs on the open side, and close it by gluing all the tabs at the same time.

To complement this information you can go to the video, where you will see the assembly techniques in real time. It clearly shows how to fold and glue the I Need your Skull figure from Proyecto Ensamble. As you can see in the video. You have to follow the numbers, and make them match the number on the back of the template. It's pretty simple once you see it.

